Hello blogger friends!
There's
something about crinkled tissue paper that I just love when it comes
to adding it to my mixed media art. Perhaps it's the aged metallic
kind of look or maybe it's the deep texture that it gives my
projects. Tissue paper is an inexpensive and easy to find supply that I often include in my artwork. Coupled with Gina's Designs Chipboard it makes beautiful canvases!

Here are the steps to making your own canvas:
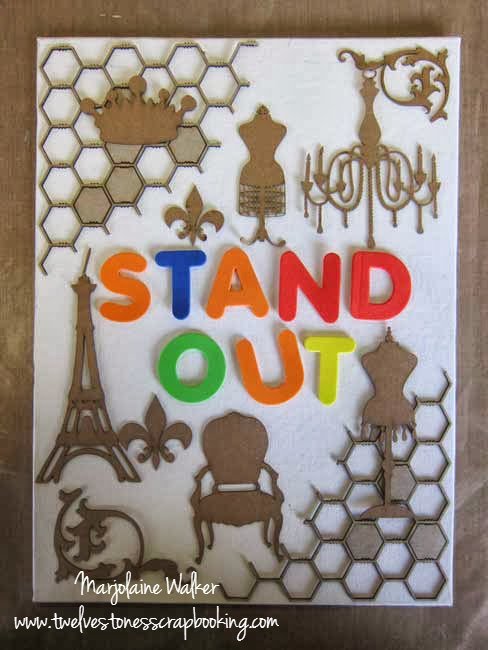
Step One: Choose the chipboard and/or foam pieces that you would like to use.

Step Two: Color all your pieces with black marker or paint and allow to
dry completely.

Step
Three: Adhere all your pieces to the canvas with liquid adhesive.

Step
Four: Coat the whole canvas with decoupage medium using a foam brush.

Step
Five: Crinkle a sheet of tissue paper, open it up and glue it down to
your canvas. Use your finger to smooth it down around all your
pieces.
Step Six: Repeat step four and five and add another layer of decoupage medium all over the surface of the canvas. Allow everything to dry before moving on.

Step
Seven: Use your finger to rub white paint on all the shapes and
letters. Allow the paint to dry or use a heat tool to speed up the
process.

Step
Eight: Rub gold paint on your letters using your finger. You can also
highlight other areas as well as the edges of your canvas.
Your
canvas is now done. Why not try a variety of colors? You can use more
than one color of tissue paper on the same canvas and choose a
contrasting paint to go with it. Another way to change it up is to
overlap your chipboard pieces which will add more depth and texture. Hope you enjoyed this tutorial and will try it out for yourself!
Supplies:
No comments:
Post a Comment