Hello blogger friends
Today's tutorial is one that I wrote many months ago. I thought I should put it to good use. Resin has become one of my favourite mediums to work with and I hope to work with it on a much more regular basis.
Supplies
Printed
cardstock
Cut out
words
Beads
Bottle
caps
1”
Circle punch
Decoupage
medium
Fast dry
liquid adhesive
Ice
Resin
Cup
Stir
stick
Garbage
bag
Old
jewellery
Pliers
Scissors
Timer
Wet
wipes
Various
paper
In this tutorial I'll show you how to create your own bottle cap embellishments to use in any paper crafting or art projects as well as jewellery. I'll teach you how to use Resin to get a more professional look.
Step
One: Cut circles out of the printed cardstock with a circle punch.
Step
Two: Cut desired words out. If you don't have any, try printing them
out from your computer or cutting them out of a magazine.
Step
Three: Cut apart the pieces of jewellery that you'd like to use. Yard
sales and thrift shops are a great place to find these kinds of
pieces.
Step
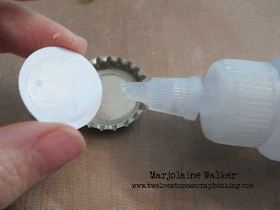
Four: Paint both sides of the circles with decoupage medium and
adhere them to the inside of the bottle caps. It's important to seal
all paper surfaces to protect them from the resin. Add your word as
well and seal the surface.
Step
Five: If some of your circles are not staying glued down, adhere them
with a fast drying glue.
Step
Six: Adhere some beads and jewellery pieces with fast drying glue. This
will prevent the pieces from floating in the resin.
Step
Seven: Cover your work space with a garbage bag. Cut both tips of the
syringe with scissors and clean the resin off your scissors with a
wipe.
Step
Eight: Remove the rectangular piece which will serve as a plug for
the left over resin. Put a thumb on each plunger and while holding it
push down on both sides to release the resin and hardener into your
cup. Stop about half way and insert the plug into the holes so the
left-overs won't dry out.
Step
Nine: Stir both mixtures together with a stir stick for one minute.
Use a timer to be sure. You'll want to mix it gently but well getting
all the sides mixed in.
Step
Ten: Begin to pour the resin mix into your bottle caps. Resin is
self doming so to get this effect simply pour just enough resin to
cover the surface. Most bubbles will disappear on their own but if
some aren't then you can huff over the surface. Your breath should
take care of any bubbles but make sure you hold your hair back! (you can also use the flame of a lighter to pop the bubbles)
Step
Eleven: In order not to waste any resin it's a good idea to have
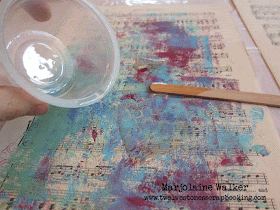
extra bottle caps ready. With the left-over mixture you can also make
resin paper by scrapping a thin layer of resin onto music sheets,
book text or patterned paper.
Step
Twelve: Allow the resin to dry. This takes 6-12 hours and it's best
just to leave it alone over night away from kids and pets. When dry
you can start a second layer by gluing down some beads.
Step
Thirteen: Repeat steps 8, 9 and ten with the rest of the resin and
allow everything to dry.
Step
Fourteen: You can also use the other side of bottle caps. Pour a
small amount of resin in the middle and watch it self-dome!
Embellished
bottle caps can be turned into brooches, necklaces, rings or
bracelets. They can be made into fridge magnets or used as
embellishments in your scrapbooking or mixed media projects, custom
made to be the perfect accessory!
Go ahead and try this and let me know how it goes!


No comments:
Post a Comment